Audit Trail in Access Forms in 6 Steps
Audit trails are useful tools (and sometimes required by law) to track data changes from your forms. Programmers often debate which is better, table level auditing or form level auditing. Personally I find table level auditing takes longer to set up. But either way works just fine. Below is a simple example of creating an audit trail on a Microsoft Access form.
First create your Audit Table (call it tblAuditTrail)
ChangeID Autonumber DateTime Date/Time UserID Short text FormName Short text FieldName Short text OldValue Short text NewValue Short text Action Short text RecordID Short text
2. Then create a newmodule, and place this code into it:
OptionCompare Database
OptionExplicit
SubAuditChanges (IDField As String, UserAction As String)
On Error GoTo AuditChanges_Err
Dim cnn As ADODB.Connection
Dim rst As ADODB.Recordset
Dim ctl As Control
Dim datTimeCheck As Date
Dim strUserID As String
Set cnn = CurrentProject.Connection
Set rst = New ADODB.Recordset
rst.Open “SELECT * FROMtblAuditTrail”, cnn, adOpenDynamic, adLockOptimistic
datTimeCheck = Now()
strUserID = Environ(“USERNAME”)
Select Case useraction
Case “EDIT”
For Each ctl InScreen.ActiveForm.Controls
If ctl.Tag = “Audit” Then
If Nz(ctl.Value) <>Nz(ctl.OldValue) Then
With rst
.AddNew
![FormName] =Screen.ActiveForm.Name
![RecordID] =Screen.ActiveForm.Controls(IDField).Value
![FieldName] =ctl.ControlSource
![OldValue] = ctl.OldValue
![NewValue] = ctl.Value
![UserID] = strUserID
![DateTime] = datTimeCheck
.Update
End With
End If
End If
Next ctl
Case Else
With rst
.AddNew
![DateTime] = datTimeCheck
![UserID] = strUserID
![FormName] =Screen.ActiveForm.Name
![Action] = useraction
![RecordID] =Screen.ActiveForm.Controls(IDField).Value
.Update
End With
End Select
AuditChanges_Exit:
On Error Resume Next
rst.Close
cnn.Close
Set rst = Nothing
Set cnn = Nothing
Exit Sub
AuditChanges_Err:
MsgBox Err.Description, vbCritical,”ERROR!”
Resume AuditChanges_Exit
EndSub
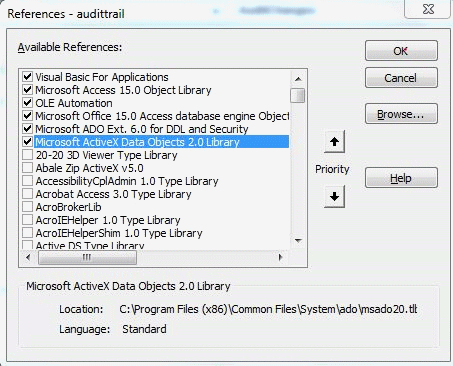
3. Check your references from the Tools menu and be sure to have these selected:

Save and close the module.
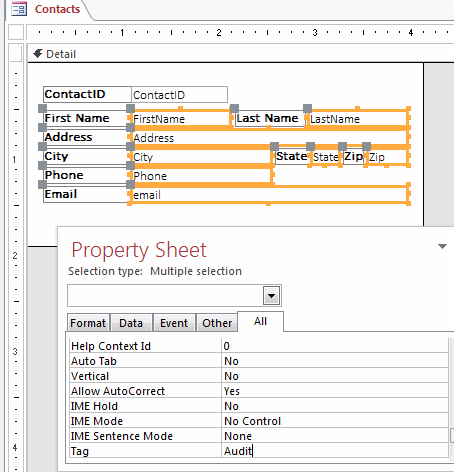
4. Next, open yourform in design view and choose the fields you want to audit. Open the propertysheet and scroll down to the Tag property (it’s at the bottom) and type Audit.All fields with the audit tag will be audited.

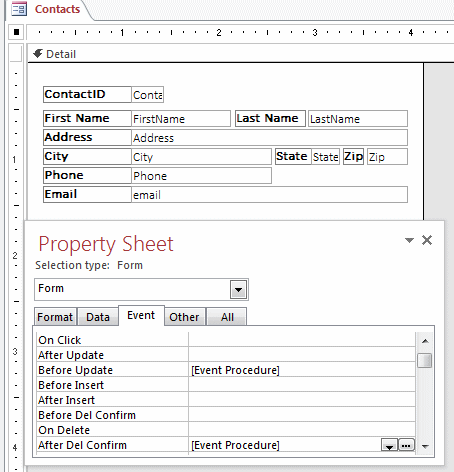
5. Behind the forms beforeupdate property, put this code:
Private Sub Form_BeforeUpdate(CancelAs Integer)
On error goto errhandler
If Me.NewRecord Then
Call AuditChanges(“ContactID”, “NEW”)
Else
Call AuditChanges(“ContactID”, “EDIT”)
End If
Exit Sub
errHandler:
MsgBox “Error ” & Err.Number& “: ” & Err.Description & ” in ” & _
VBE.ActiveCodePane.CodeModule,vbOKOnly, “Error”
End Sub
♫NOTE: Where I haveContactID you wouldchange that to whatever your key field is (EmployeeID, RoomID, etc)
6. And behind the forms After Delete Confirm, add this code:
Private SubForm_AfterDelConfirm(Status As Integer)
On error goto errhandler
If Status = acDeleteOK Then Call AuditChanges(“ContactID”,”DELETE”)
ExitSub
errHandler:
MsgBox “Error ” & Err.Number& “: ” & Err.Description & ” in ” & _
VBE.ActiveCodePane.CodeModule,vbOKOnly, “Error”
End Sub
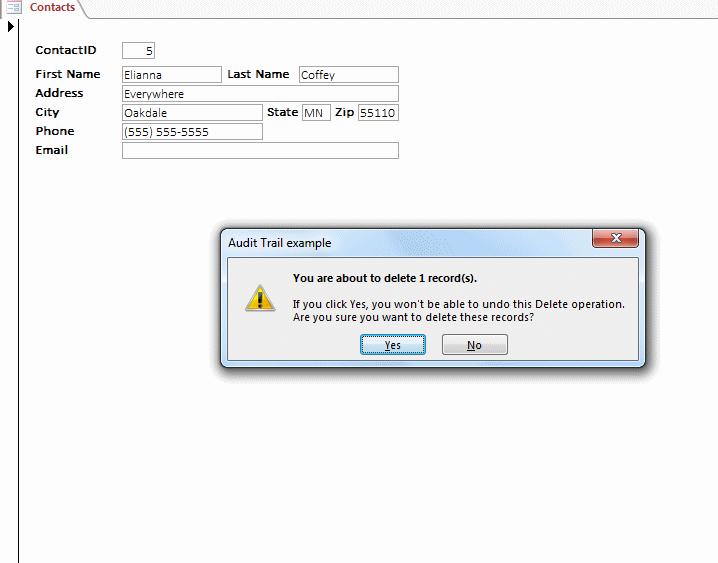
This istriggered when the user confirms the deletion of a record.
That’s it! You can audit away.
Microsoft Office Forms:
MS Access 2003
Access 2007
Access 2010
Access 2013
Microsoft Office VBA, MS Access 2003, 2007, 2010, 2013, 2016